Chimichurri steak

The Best Conidiment you never cooked.

photography by: The Eclectic Kitchen

photography by: The Eclectic Kitchen

When The Eclectic Kitchen and I were curating for our blogs, we both agreed that a great Chimichurri recipe was a must. Chimichurri is a South American staple and is considered the “BBQ sauce” of Argentina. This blend of herbs and spices, reaches far beyond a marinade. Chimichurri can be used as a sauce to top grilled steak, as I’ve used it here, and can also compliment eggs, fish and chicken.

As a mom, I set out on a journey to develop my son’s palate. I think most of us are afraid to introduce spice and flavor to our kids, but I’ve found that the less of a “big deal” I make about feeding him flavorful foods, the more he actually eats! We are so afraid to create picky palates, yet we don’t feed them exotic flavors to develop their individual tastes! I encourage you to try this recipe and drizzle it over one of their favorite foods! I think you might even surprise yourself!

photography by: The Eclectic Kitchen

photography by: The Eclectic Kitchen

Chimichurri Steak

Beetroot Hummus

You’ll never need to buy hummus again! This sweet and salty hummus is the perfect protein PACKED dip for veggies, chicken or avocado toast.

PHOTOGRAPHY BY THE ECLECTIC KITCHEN

PHOTOGRAPHY BY THE ECLECTIC KITCHEN

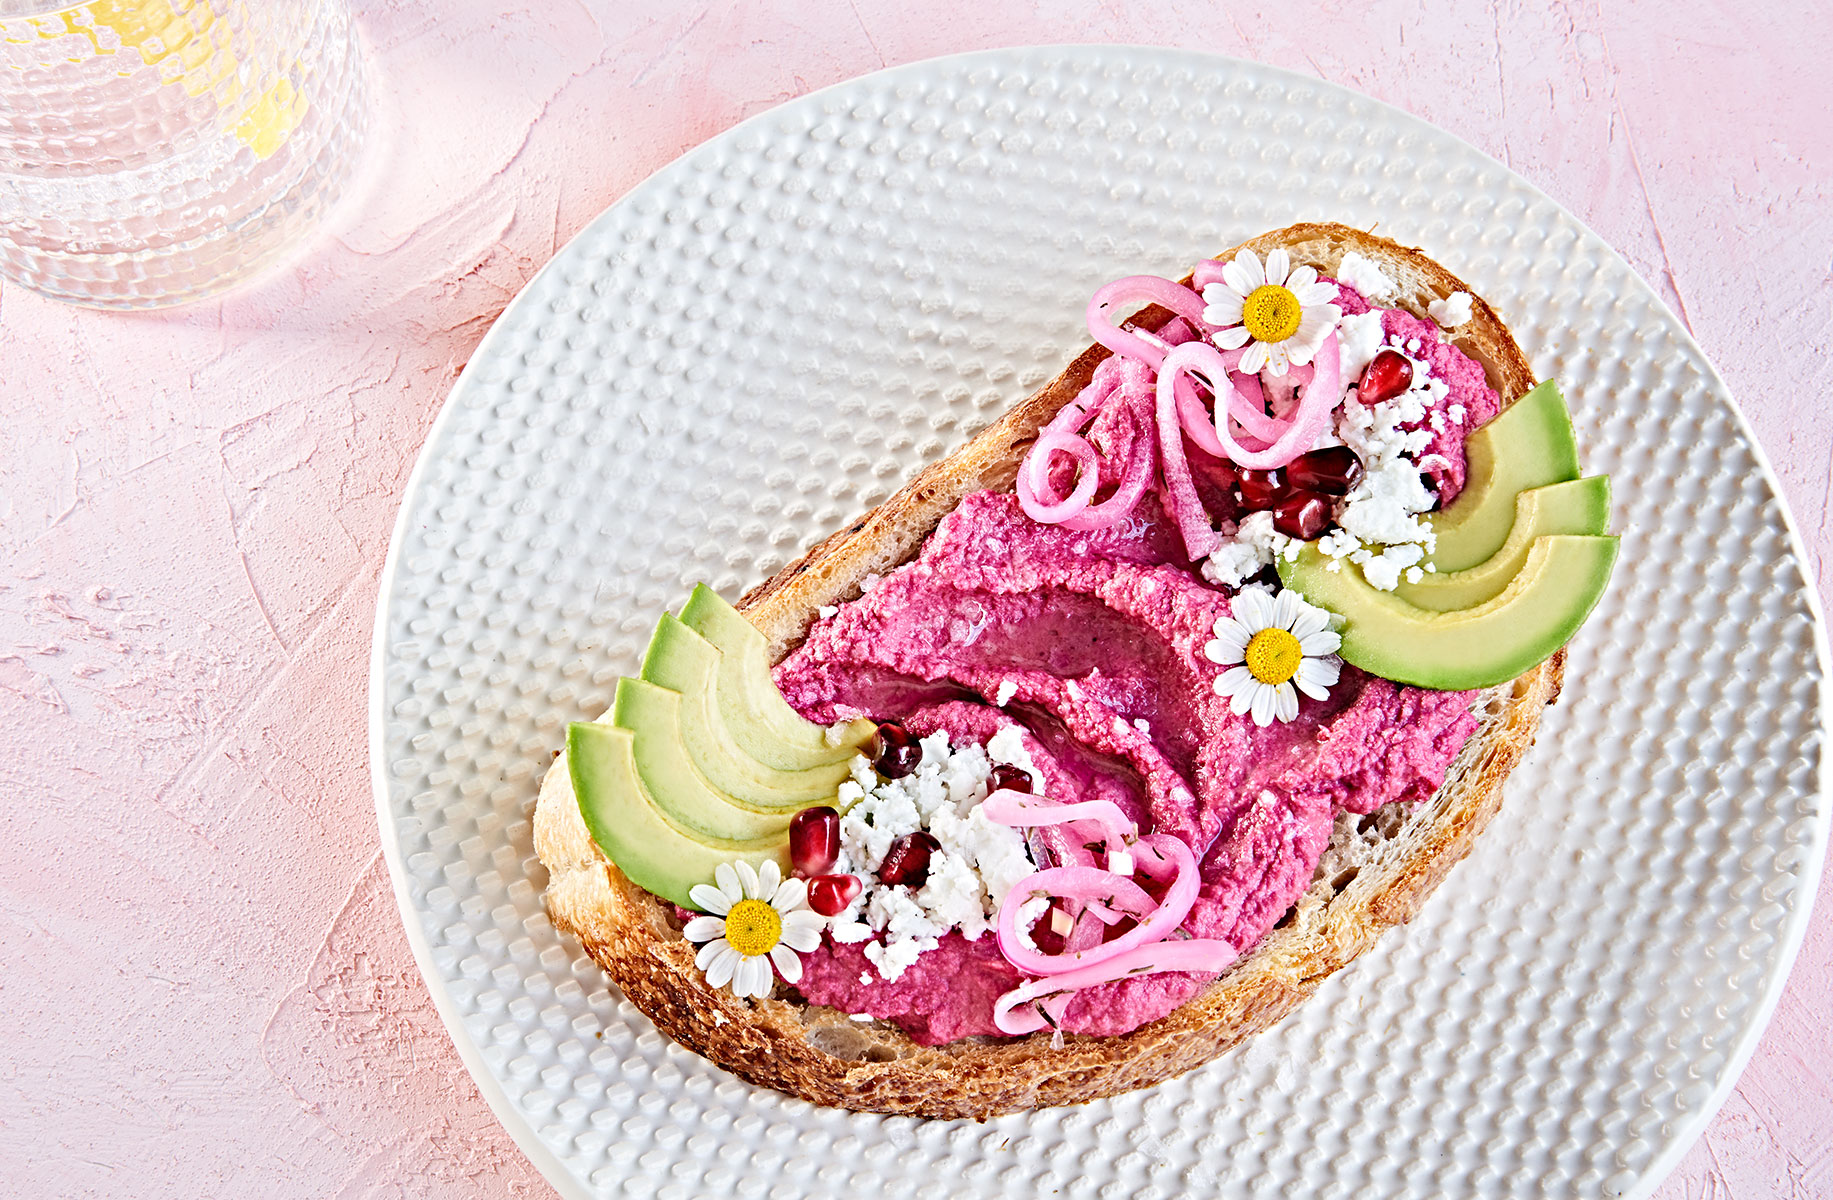
Spring has officially sprung over here Los Angeles and The eclectic kitchen and I took full advantage of the beautiful colors and blooms as inspiration for this beetroot hummus avocado toast. One of the great perks of having my own blog is that I get to play and have fun with food rather than always being limited by what my clients needs are. Have fun we sure did while shooting this “Barbie toast” as I like to call it.

This creamy hummus truly has it all. It looks like you slaved away soaking and mashing chickpeas, when in fact, the beans are canned, the beets are already roasted and all you have to do is blitz everything in a food processor. You and your kids will love dipping veggies, crackers and chicken nuggets into this protein packed snack!

Beetroot Hummus

Recipe by: Skylar Edberg in collaboration with The Eclectic Kitchen

Yield: 3 cups

Prep time: 45 minutes

INGREDIENTS

  • 2 (15-oz.) cans chickpeas, drained, rinsed

  • 2 cups cooked beets, roughly chopped

  • 2 garlic cloves, grated

  • 6 tablespoons tahini

  • 6 tablespoons fresh lemon juice

  • 1 teaspoon kosher salt

  • ¼ cup extra virgin olive oil

  • Pinenuts, fresh herbs and lemon zest for garnish

METHOD

Place the chickpeas In a medium saucepan and cover with water about 1 inch above the beans. Bring the chickpeas to a boil over high heat, then reduce heat to medium-low and simmer, until chickpeas begin to fall apart, about 20 minutes. Carefully Reserve 1 cup cooking liquid and drain.

In a food processor pulse together the warm chickpeas, beets, garlic, tahini lemon juice and salt. Slowly drizzle in the olive oil until desired consistency is achieved.

Serve the hummus spread over a piece of rustic bread and top with avocado, flaked sea salt and fresh herbs or serve as a dip with pita chips and veggies! This dip is very versatile and keeps in the refrigerator for about 1 week.


Pink Pickled Onions

These easy,beautiful and zesty pink onion ribbons are the perfect addition to your next family meal!

One of my favorite tacos in Los Angeles is from Pink Taco. They are known for their signature “pink onions” and because I can’t quite make it out to the Sunset Strip with a one year old, I had to bring the pink taco onions to my kitchen! These are not only SUPER simple, but they keep in your refrigerator for weeks (If they last that long)! They look super fancy like you put in all this effort, but they are one of the easiest sides ever. I hope you enjoy this vibrant condiment as much as The Eclectic Kitchen and I do!

PINK PICKLED ONIONS

Recipe by: Skylar Edberg in collaboration with The Eclectic Kitchen

Yield: 4 servings

Prep time: overnight

Cook time: 5 minutes

INGREDIENTS

  • 2 small red onions, very thinly sliced

  • 1 cup hot water

  • 1 cup white wine vinegar

  • 3 tablespoons granulated cane sugar, raw preferably

  • 2 teaspoons kosher salt

  • ½  teaspoon dried thyme leaves

METHOD

Place the onion slices in a large mason jar, use two if necessary. In a separate bowl or large liquid measuring cup, whisk together the hot water, vinegar, sugar, salt and dried thyme leaves until sugar and salt are dissolved, about 1 minute. Pour the mixture over the onions, tightly seal the lid to the jar/jars and allow the onions to pickle in the refrigerator for at least 2 hours or overnight for best results.

“Cheesy” Cashew Alfredo

It’s Cheesy, yet it’s vegan.it’s creamy, yet there’s no dairy. You’ll never Alfredo the same.

Crystal-Cartier-df-alfredo--8304.jpg


When I first started writing this recipe I was going to write it as a chicken Alfredo recipe, but then I realized how versatile the insanely cream sauce could be! I wanted something both my little one and my hubby could enjoy without having to make separate meals!

The only thinking ahead you need to do for this recipe is making sure the cashews have enough time to soak. Either soak them in boiling water for 2 hours or overnight in the fridge for 8. If you have the time and patience, the longer soak does make an extra creamy sauce!

The second thing you will need is a high powered blender. Once you dump all of the ingredients in, the blender does the rest of the work. Something like a Vitamix or Blendtech would work best. If your blender is not a high speed blender (most are) blend the ingredients until smooth and simmer over medium low heat for about 10 minutes. The idea is If you blend the sauce long enough, the heat from the blender actually cooks the sauce for you!

I hope you enjoy this decadent yet squeaky clean recipe that the entire family will love!

“Cheesy” Cashew Alfredo

Recipe by: Skylar Edberg in collaboration with The Eclectic Kitchen

Yield: 4 servings

Prep time: overnight

Cook time: 5 minutes

INGREDIENTS

  • 2 cups raw cashews, soaked overnight in the refrigerator or in boiling water for 2 hours

  • 1 cup cashew milk or unsweetened almond milk

  • 3 garlic cloves, peeled

  • 2 teaspoon lemon zest

  • 2 tablespoons lemon juice

  • ⅛ teaspoon freshly grated nutmeg

  • ¼  cup finely diced yellow onion

  • 2 tablespoons nutritional yeast

  • 1 tablespoon kosher salt

  • 1 teaspoon freshly ground black pepper

METHOD

Add soaked cashews, nut milk, garlic, lemon zest, lemon juice, onion, nutritional yeast, salt and oregano to a high powered blender on full speed for about 3 minutes until completely smooth and steaming. (If your blender is not a high speed blender, most are, blend the ingredients until smooth and simmer over medium low heat for about 10 minutes)

Serve sauce warm with pasta topped with chicken or parmesan cheese and parsley.


Miso Glazed Salmon with Garlic Bok Choy

This easy prep-ahead weeknight meal has minimal ingredients with maximum flavor.

Crystal-Cartier-miso-salmon-8074.jpg

Cooking salmon doesn’t need to be boring, dry or difficult! Most recipes tell you that salmon can’t marinate for longer than 20 minutes due to the acidity in the marinade, but this miso marinade actually gets better the longer it sits! This means, you can throw the marinade and the salmon into the fridge in the morning and have dinner on the table in less than 30 minutes! I call this an “Omega-Mom” Moment!

This sweet and salty salmon will have the teriyaki flavor profile that your kids crave, but a sophistication that will leave YOU feeling satisfied too!

The main ingredient in the marinade is miso paste. It can be found at any grocery store other than Trader Joes (boooooo). It’s refrigerated and usually hangs out next to the tofu and veggie cheeses. Miso paste has a long shelf life. You can mix it into soups, condiments like mayo, and even toss it with pasta for an amazing umami flavor.

I hope you experiment with it and enjoy this delicious salmon as much as I do!


Crystal-Cartier-miso-salmon-8123.jpg

Miso Glazed Salmon with Garlic Bok Choy

Recipe by: Skylar Edberg in collaboration with The Eclectic Kitchen

Yield: 2 servings

Prep time: 10 minutes, plus 30 min+ for marinating

Cook time: 20 minutes

INGREDIENTS

For the Salmon:

  • 1/4 cup low-sodium soy sauce

  • 1/4 cup maple syrup

  • 2 garlic cloves, grated

  • 1 tablespoon miso paste

  • 1 teaspoon freshly grated ginger

  • 2, 8-ounce salmon fillets, skin on

  • 2 tablespoons vegetable oil

    For the Boy Choy:

  • 1 pound baby bok choy, rinsed

  • 1 tablespoon vegetable oil

  • 2 garlic cloves minced

  • Scallions for garnish

METHOD

In a small bowl, whisk together soy sauce, maple syrup, garlic, miso paste and ginger until well combined.

Add salmon to a gallon size ziploc bag and pour the marinade over the top. Refrigerate for at least 30 minutes or overnight.

Preheat oven to 400 degrees.

Preheat a large cast-iron or ovenproof skillet over medium-high heat and drizzle with vegetable oil. Sear the salmon skin side down for about 2 minutes. Transfer the skillet to the preheated oven. Bake for 15 to 20 minutes and finish by broiling for 2-3 minutes until crispy and golden.

Make sure to reserve any leftover marinade.

Pour remaining reserved marinade into a large skillet over medium-high heat. Add the bok choy, oil and garlic and saute for about 4 minutes until the bok choy is wilted and cooked through.

Serve salmon over rice,with garlic bok choy and drizzle with reduced sauce. Garnish with sliced scallions.


Refrigerator Quick Pickles

Refrigerator quick pickles are a fast, easy and healthier way to make pickles at home in less than 24 hours.

Crystal-Cartier-quick-fridge-pickles-7830.jpg

Pickles! You either love em’ or you hate em’. I am personally team pickle all the way! There is something SO refreshing about sitting down with a turkey sandwich and crunching into a crispy, tangy and slightly sweet pickle!

Pickling for me always looked intimidating and seemed like something hipsters in Silverlake were making in on a co-op where they raised their own chickens and made kimchi in the backyard in clay pots. Not that that doesn’t sound amazing, but as your average toddler mom, I don’t have the time or energy to wait on fermented pickles. I never thought I could make pickles untilI discovered the quick pickle!

Guys…This is So easy and the brine just keeps on brining! You can make a big batch of these and use the brine a second or 3rd time. All you have to do is add more Persian cucumbers! You can also use this brine for carrots and onion if your heart tells you its right. If you love pickles, you will love these crunchy little delights!


Refrigerator Quick Pickles

Recipe by: Skylar Edberg in collaboration with The Eclectic Kitchen

Yield: 2 quart size jars

Prep time: 10 minutes

INGREDIENTS

  • 4 garlic cloves, diced

  • 2 teaspoons whole peppercorns

  • 1 teaspoon coriander seeds

  • 1 teaspoon whole mustard seeds

  • 1 pound of persian cucumbers, cut into spears

  • 8 sprigs fresh dill

  • 1 ½  cups white vinegar

  • 3 cups water

  • 1 ½  tablespoons granulated cane sugar

  • 1 Tablespoon kosher or himalayan sea salt

  • 4 clean mason jars with lids

    METHOD

  • Divide the garlic, peppercorns and coriander seeds evenly into the bottom of each mason jar. Evenly distribute the cucumber spears and dill  into each jar.

  • In a liquid measuring cup, whisk together the vinegar, water, sugar and salt until sugar and salt are dissolved. Pour the liquid over the cucumbers and secure lid to each jar. Allow pickles to brine in the liquid for at least 12 hours and up to 2 weeks.


Creamy Roasted Tomato Soup

Creamy Roasted Tomato Soup

It’s finally getting Chilly! Growing up in Southern California, I’ve always longed for a “White Christmas” and the cozy feeling everyone speaks of during the holidays. Luckily for us, we have access to amazing produce year round so this roasted tomato soup, is a quick and easy reason to warm up during the colder months. Instead of using heavy cream, I’ve substituted whole milk greek yogurt for added protein and less guilt. Serve alone or paired with a grilled cheese sandwich!